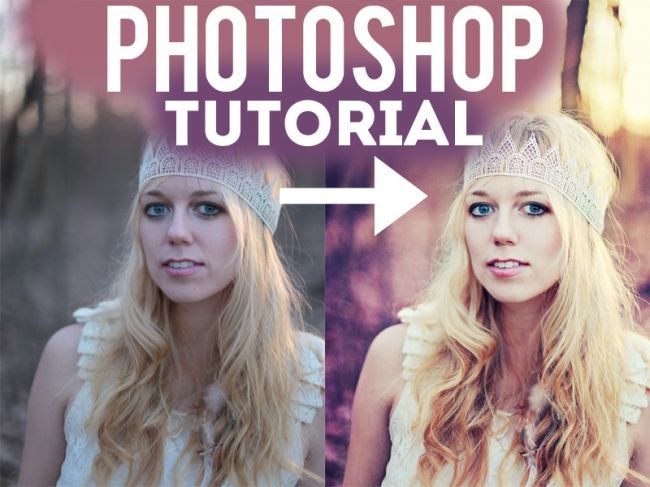
A Photoshop Tutorial in 12 Steps.

Yes! Thatās right! This tutorial is SO AMAZING that it comes with pre-made notes with appropriate links all included! WHOA! Someone lovesĀ you!
00:00 Intro!!! (I apologise for the strange āhello everyoneā but I was in a hyper mood :P)
00:11 Photo taken by Rachel Joy Baransi! Check out her work HERE! HUGE THANKS TO RACHEL! The photo was originally seen in our online editing group.
00:55 STEP ONEĀ Fix all distractions with the Patch Tool! (Shortcut = j). Circle any distraction and drag it to a location that you would like to replace it with.
01:59 STEP TWOĀ Correct Skin ToneĀ Take your brush toolĀ (shortcut = b), adjust size and hardness. Select a colour of her skin that is quite light by holding down the alt key and clicking on the area that contains the colour. Lower the opacity to 20% (shortcut = 2) and draw over all of the darker or reddish areas of her skin. Lower the layer itself to about 60%.
03:01 STEP THREEĀ Add volume of her hair! Command + alt + shift + E to merge all layers. Select the area that youād like to alter and then go Filter > Liquify. Use the Forward Warp ToolĀ (shortcut = w). Adjust brush size to suit. Gently pull out all edges of her hair for added volume. Be careful of changing the shape of her face/body! We do not like warped portraits (unless itās done on purpose! ha!). Add a layer mask, take your brush toolĀ (shortcut = b), change your colour palette to black and white by clicking the d key on your keyboard. Then colour black over the areas of her that you DONāT want to be warped (aka her face/skin/body etcā¦).
06:05 STEP FOURĀ Fun with ACTIONS! A bit of an introduction to what inspires the colours in my photographs:Ā The October 2011 Collection. The November 2011 Collection. The December 2011 Collection. and The Confidence Collection!
06:27 STEP FIVEĀ Add definition with CONTOUR! Press play on the CONTOUR action. Grab your brush tool, adjust size and hardness, place it at an opacity of 20%Ā (shortcut = 2). Colour black over all of the areas that naturally have shadows (under cheekbones, make up, hair, etc..) Press the x key to change the brush colour to white. Brush over all areas with a natural highlight (cheekbones, eyes, hair, etcā¦) If the effect is too strong and sharp, try blurring it. Filter > Blur > Gaussian Blur. Adjust to suit. If itās still too strong, adjust opacity of the CONTOUR layer itself.
09:50 STEP SIXĀ Add sharpness with āBoom Boom PowāĀ (available inĀ The Confidence Collection) and āAlexās Sharpyā! Press play on both actions, adjust opacities to suit your needs.
11:05 STEP SEVENĀ Use āSheās So Luckyā to brighten the photo. We used a low opacity of 15%, but adjust to suit your needs and tastes.
11:39 STEP EIGHTĀ Use āRed Velvetā (available inĀ The Confidence Collection) to add a beautiful warmth to the image.Ā We used the opacity of 40%, but adjust to suit your needs and tastes.
12:05 STEP NINEĀ Use āSweet and Dreamyā to add lovely colouring.Ā We used the opacity of 30%, but adjust to suit your needs and tastes.
12:26 STEP TENĀ Use the secret layer in āStylishā to add some gorgeous colour. Press play on the Stylish action. Open up the action and make sure that the hidden layer is changed to visible. I made the last layer of the Stylish action hidden again because we didnāt need the added brightness.Ā I changed the opacity to 80%, added a layer mask, and used my brush tool (shortcut = b)Ā at 100% (shortcut = 0)Ā in black to brush over all the areas that I donāt want Stylish to be visible (skin, face, body etc..). Donāt forget toĀ adjust size and hardnessĀ of brush.
14:20 STEP ELEVENĀ Add warmth with āMaracasā at 20%.
14:40 STEP TWELVEĀ Add warmth to the background usingĀ āMaracasā at 20%. Do this by pressing play to Maracas, then using the gradient tool (shortcut = g) with colours black to white across the photo so that you can only see the second āMaracasā action on the top right part of the image (as if thatās where the sunās warmth was coming from).Ā Then use your brush tool (shortcut = b)Ā at 100% (shortcut = 0)Ā in black to brush over all the areas that you donāt want the second round of Maracas to be (skin, face, body etc..)