DIY Dining Table Tutorial
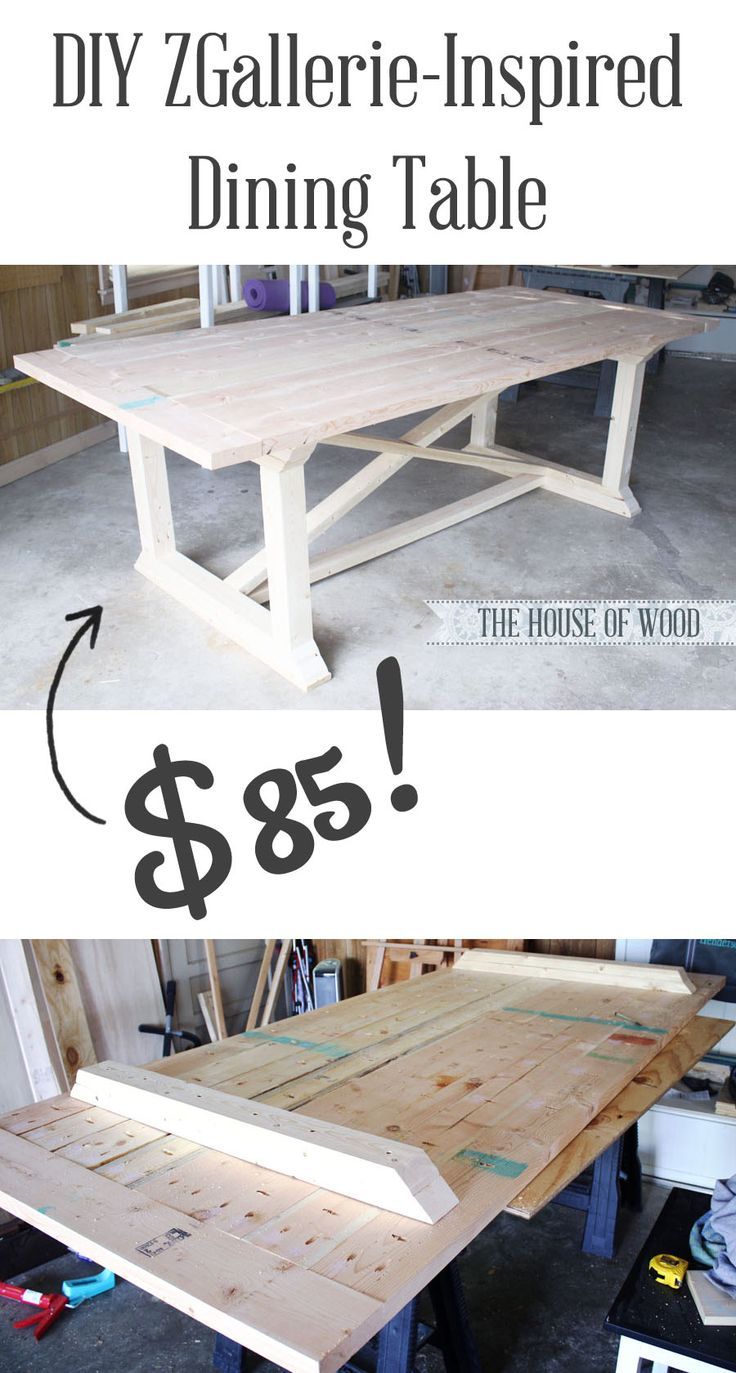
And for those of you building, plans follow and here’s a few plan notes:
– Tabletop boards (as noted in cut list) are 83 3/4″ long
– Once you get one end cut for “curved” ends, use it as a pattern for the rest
– You may want to measure and cut as you go for the leg “curved end” cuts so the ends match up perfectly, measuring the short end of the first board to get the long end measurement for the second board.
– I highly recommend if you can running the 2x4s through the tablesaw first to get a nice square edge. Take 1/4″ off each edge.
– For the small cross stretchers, most miter saws will bevel 50 degrees. If your saw does not, you can use a 2×2 and cut with jigsaw/circular saw instead, cutting an angle cut at 50 degrees off square.
Happy Building!
TOOLS:
- Tape Measure
- Speed Square
- Pencil
- Pocket Hole Jig
- Drill
- Miter Saw
- Table Saw
- Brad Nailer
- Sander
- Drill Bit Set
MATERIALS:
- (9) 2 x 6 x 8 Ft. Boards
- (9) 2 x 4 x 8 Ft. Boards
- (1) 1 x 4 x 8 Ft. Boards
- 2 1/2-inch Pocket Hole Screws
- 2 1/2-inch Wood Screws
- Wood Glue
General Instructions:
Please read through the entire plan and all comments before beginning this project. It is also advisable to review the Getting Started Section. Take all necessary precautions to build safely and smartly. Work on a clean level surface, free of imperfections or debris. Always use straight boards. Check for square after each step. Always predrill holes before attaching with screws. Use glue with finish nails for a stronger hold. Wipe excess glue off bare wood for stained projects, as dried glue will not take stain. Be safe, have fun, and ask for help if you need it. Good luck!
Dimensions:
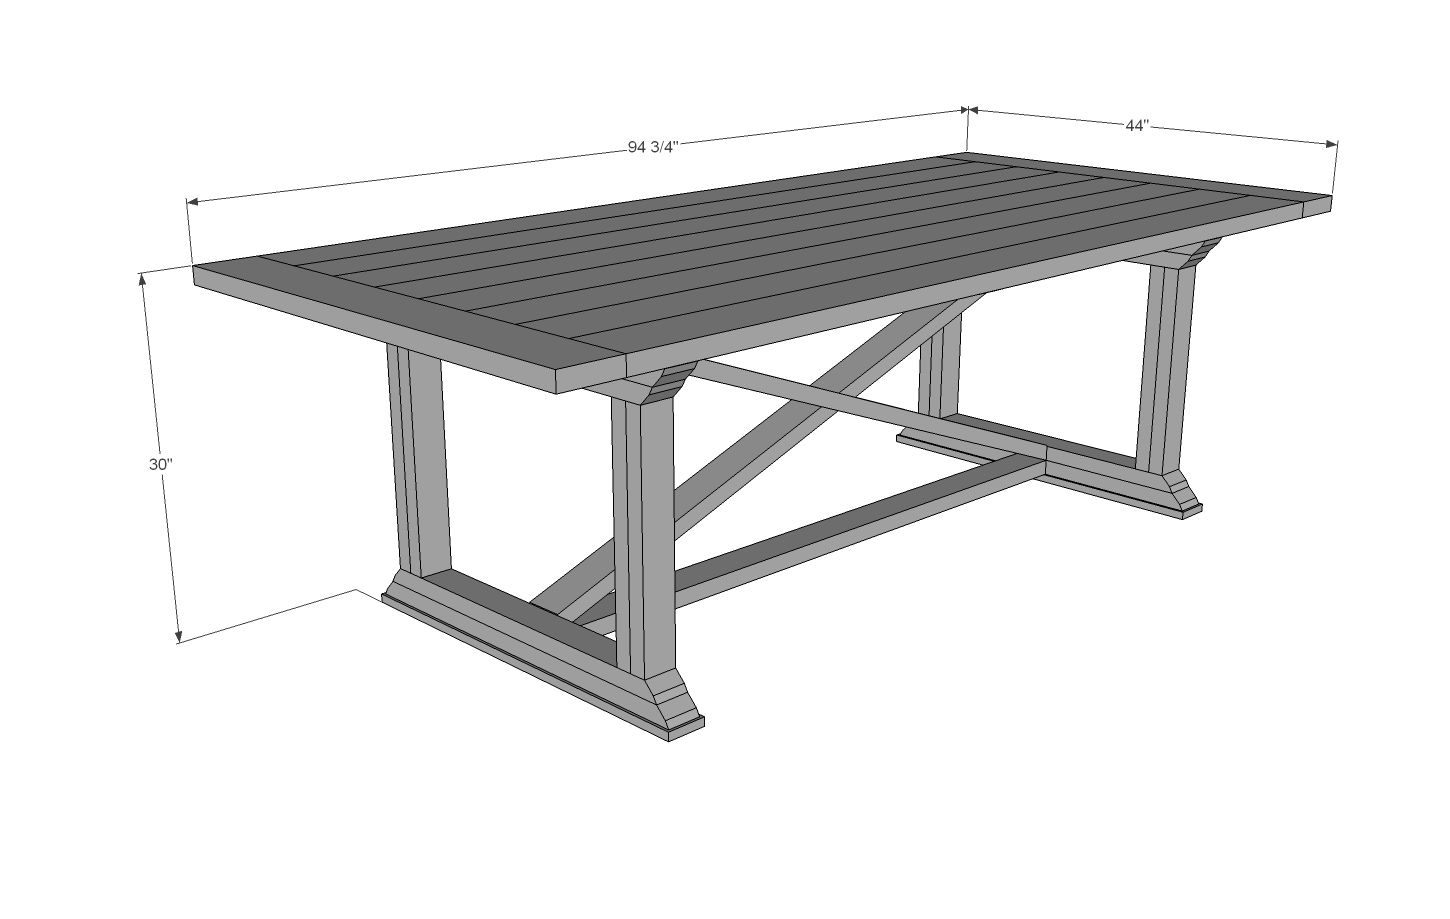
Cut List:
8 – 2×6 @ 83 1/2″ (tabletop boards) – measurement shown in diagram is wrong
2 – 2×6 @ 44″ (breadboard ends) – CUT TO FIT!!!
3 – 2×4 @ 38″ (long point to long point, ends cut at 30 degrees off square, ends are NOT parallel)
4 – 2×4 @ 35 1/2″ (long point to long point, ends cut at 30 degrees off square, ends are NOT parallel)
4 – 2×4 @ 33″ (long point to long point, ends cut at 30 degrees off square, ends are NOT parallel)
8 – 2×4 @ 20 1/4″
2 – 1×4 @ 36″
1 – 2×4 @ 64″
1 – 2×4 or 2×2 @ 68 5/8″ (long point to short point, both ends cut PARALLEL at 20 degrees off square)
2 – 2×4 or 2×2 @ 34″ (longest point measurement, both ends cut INWARD from measurement, one at 50 degrees off square and one at 20 degrees off square)
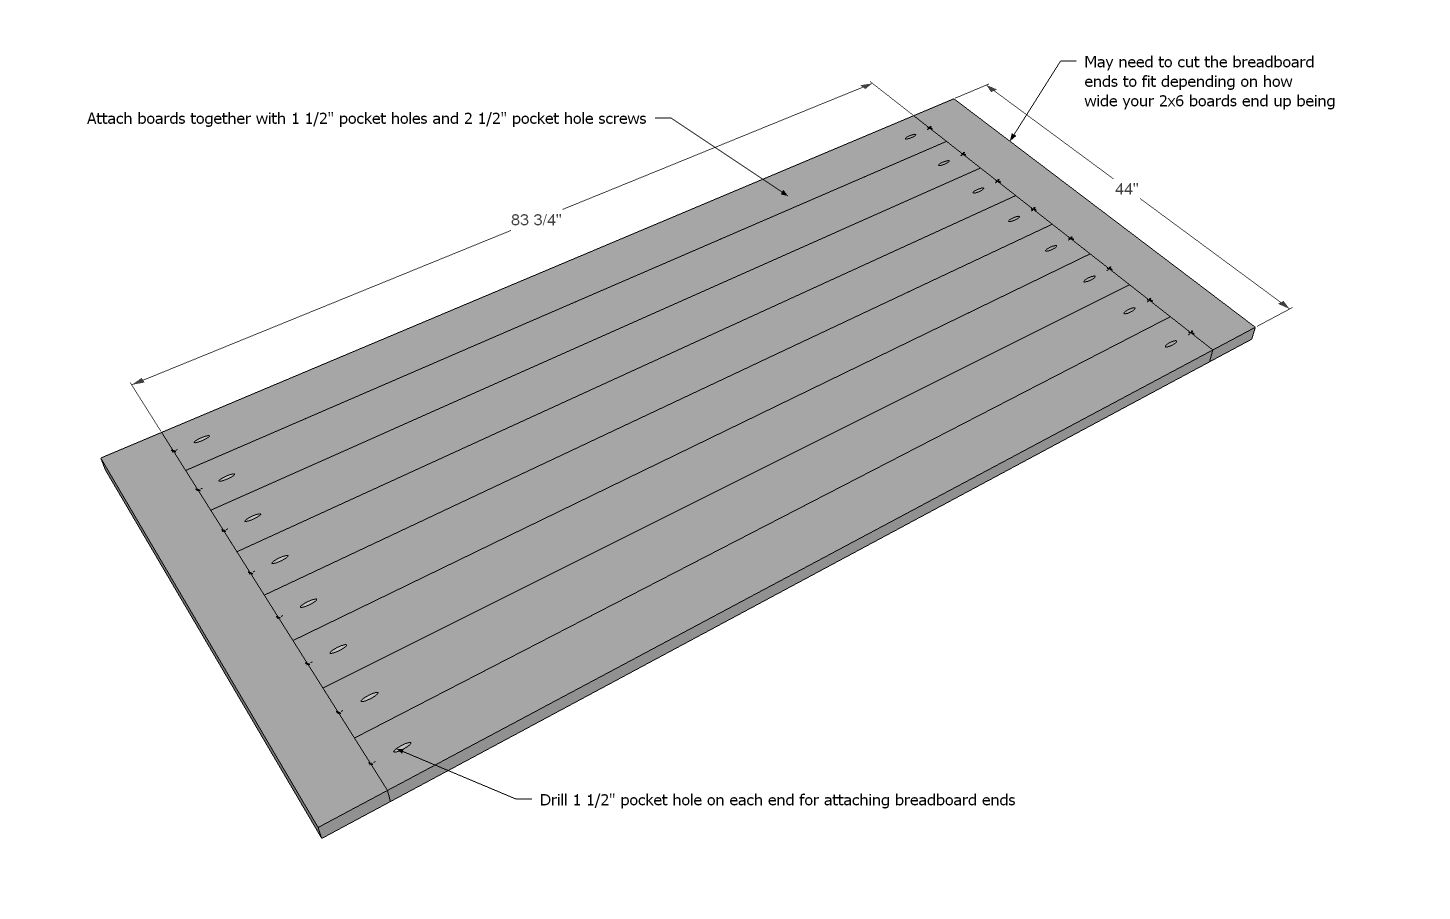
Step 1:
Build your tabletop first with 1 1/2″ pocket holes and 2 1/2″ pocket hole screws. A trick I do is build the tabletop without breadboard ends first. Then I take a circular saw (using a clamped board as a guide) and run it down the end edges to make sure all my boards are exactly the same length. Then I measure and cut the breadboard end to fit and attach it.
For a smoother tabletop, try using tongue and groove for the tabletop boards.

Step 2 Instructions:
This is the pattern for cutting the curved edge boards. Once you get one end cut right, use it as a pattern for cutting the rest.
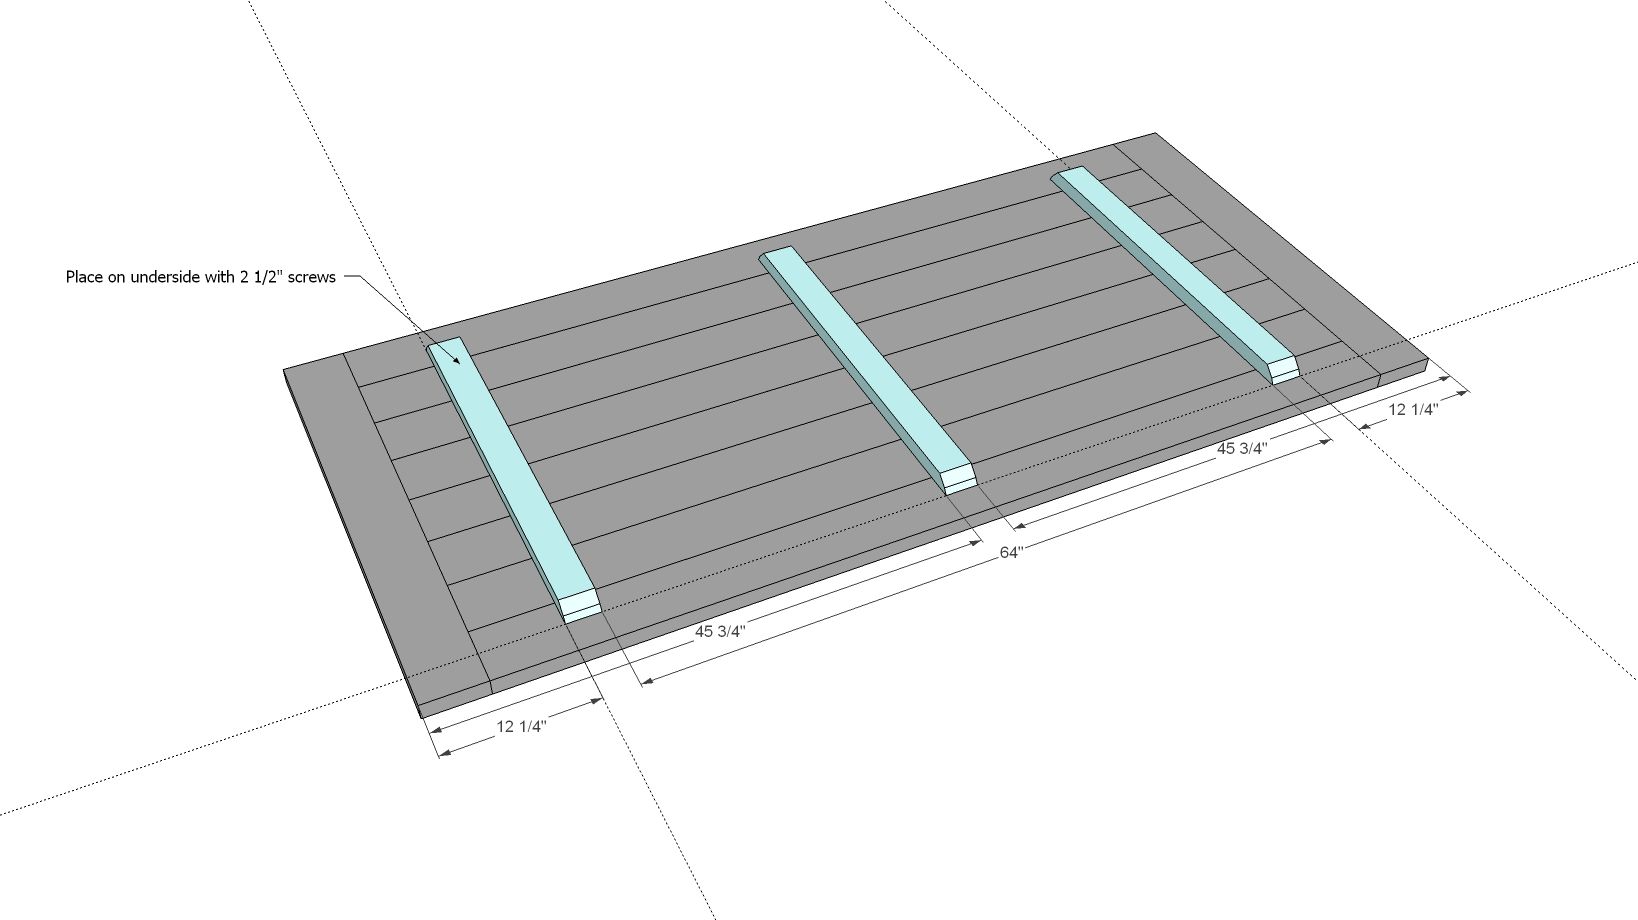
Step 3 Instructions:
Attach the three longest curved end boards to underside of tabletop.
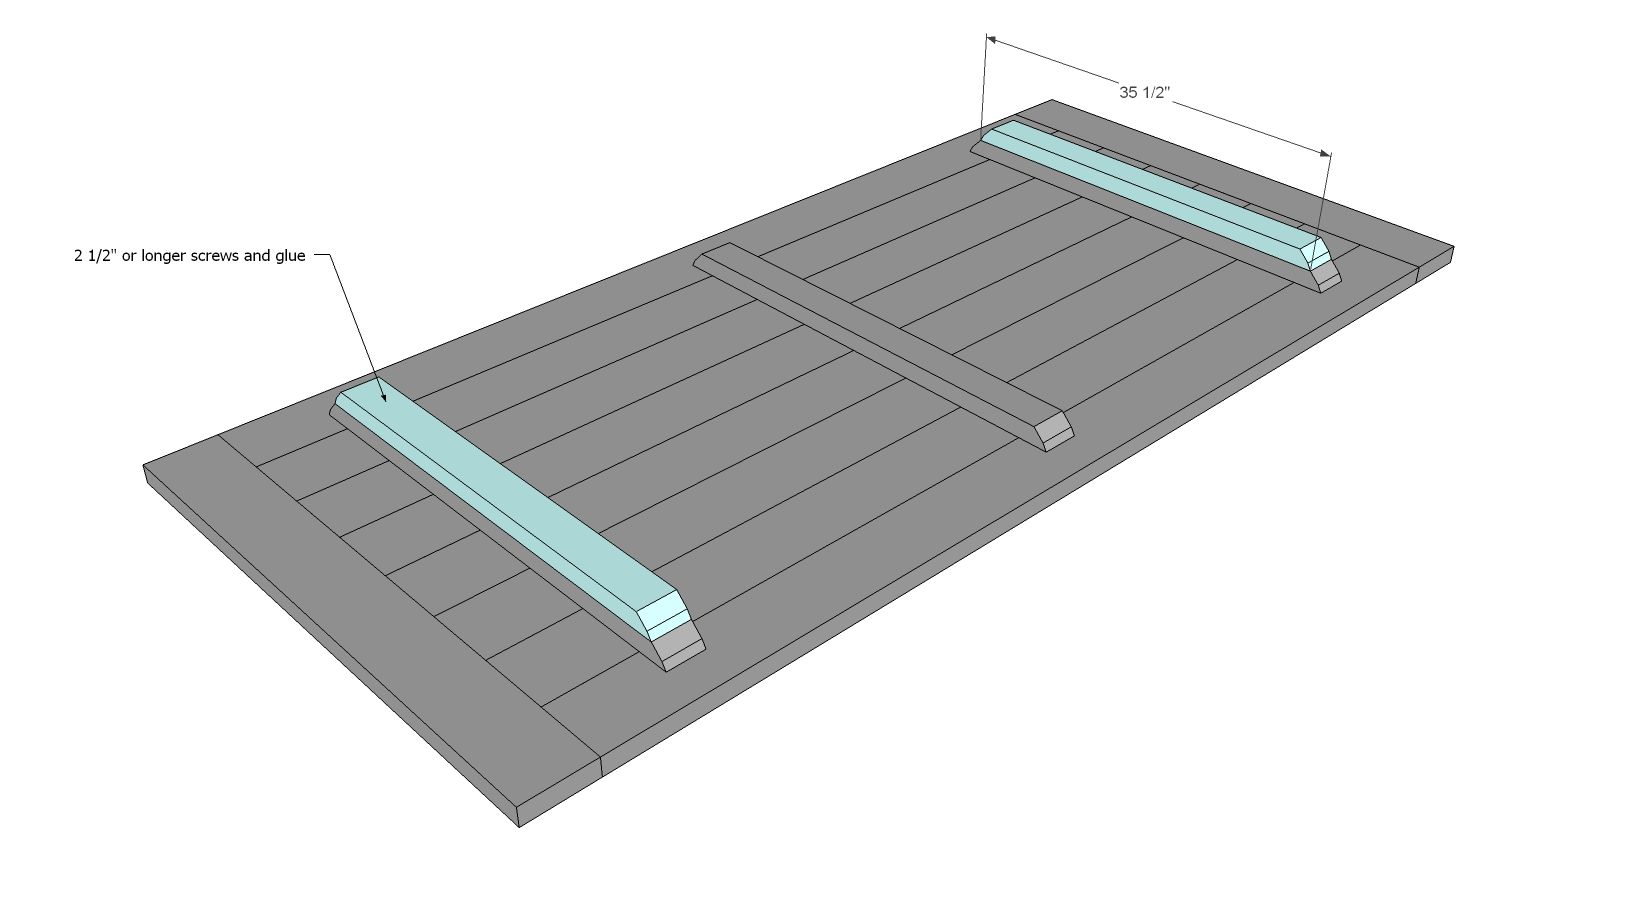
Step 4 Instructions:
Then stack the next row on top. You can hide screws here if you are using screws, just make sure they are countersunk.
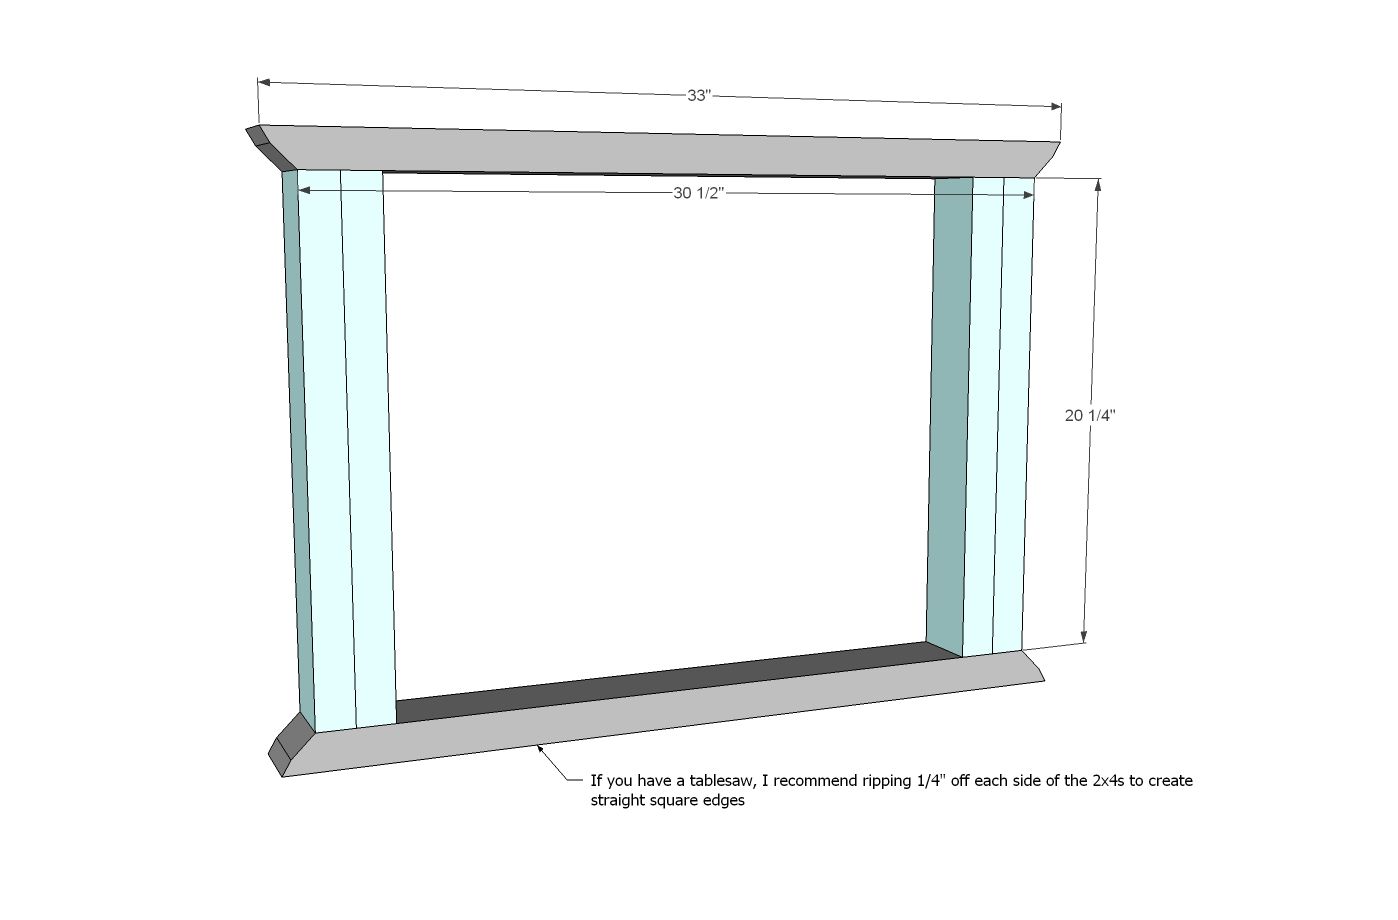
Step 5 Instructions:
Build the leg sets as shown here.
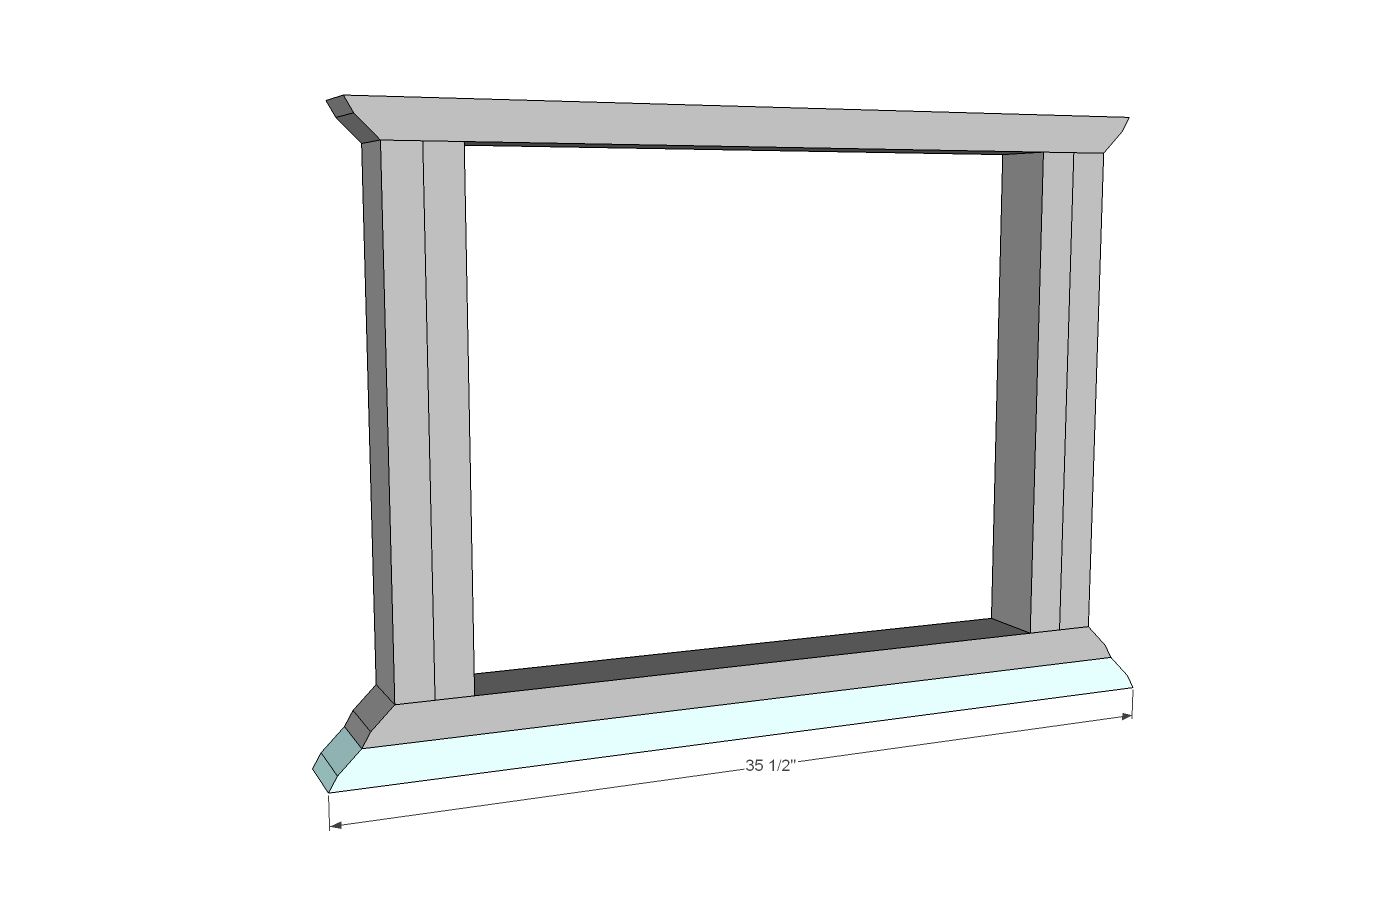
Step 6 Instructions:
Add the second base to the leg set.
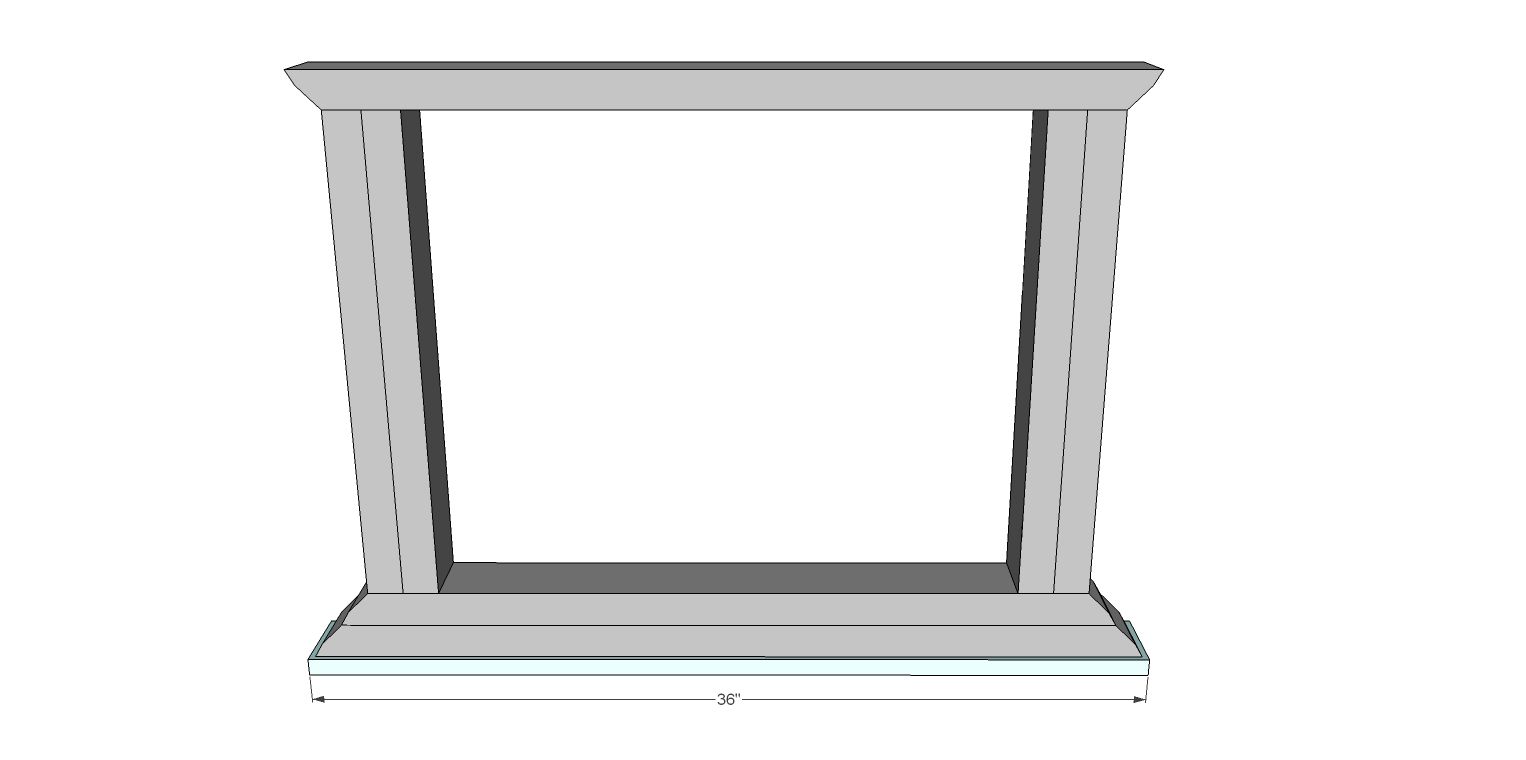
Step 7 Instructions:
And then the foot.
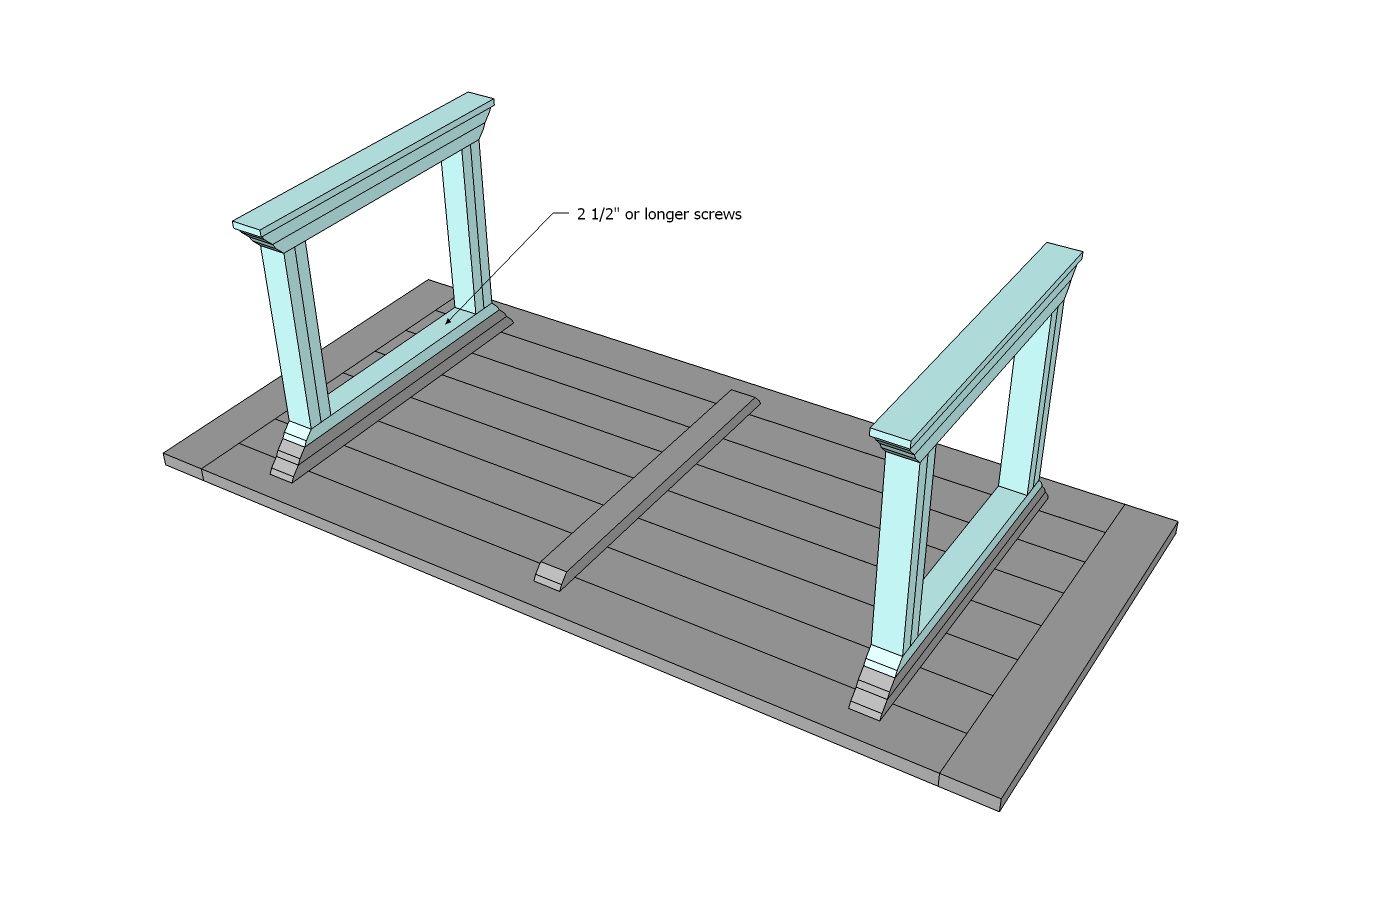
Step 8 Instructions:
And then attach the leg sets to the underside of the table.
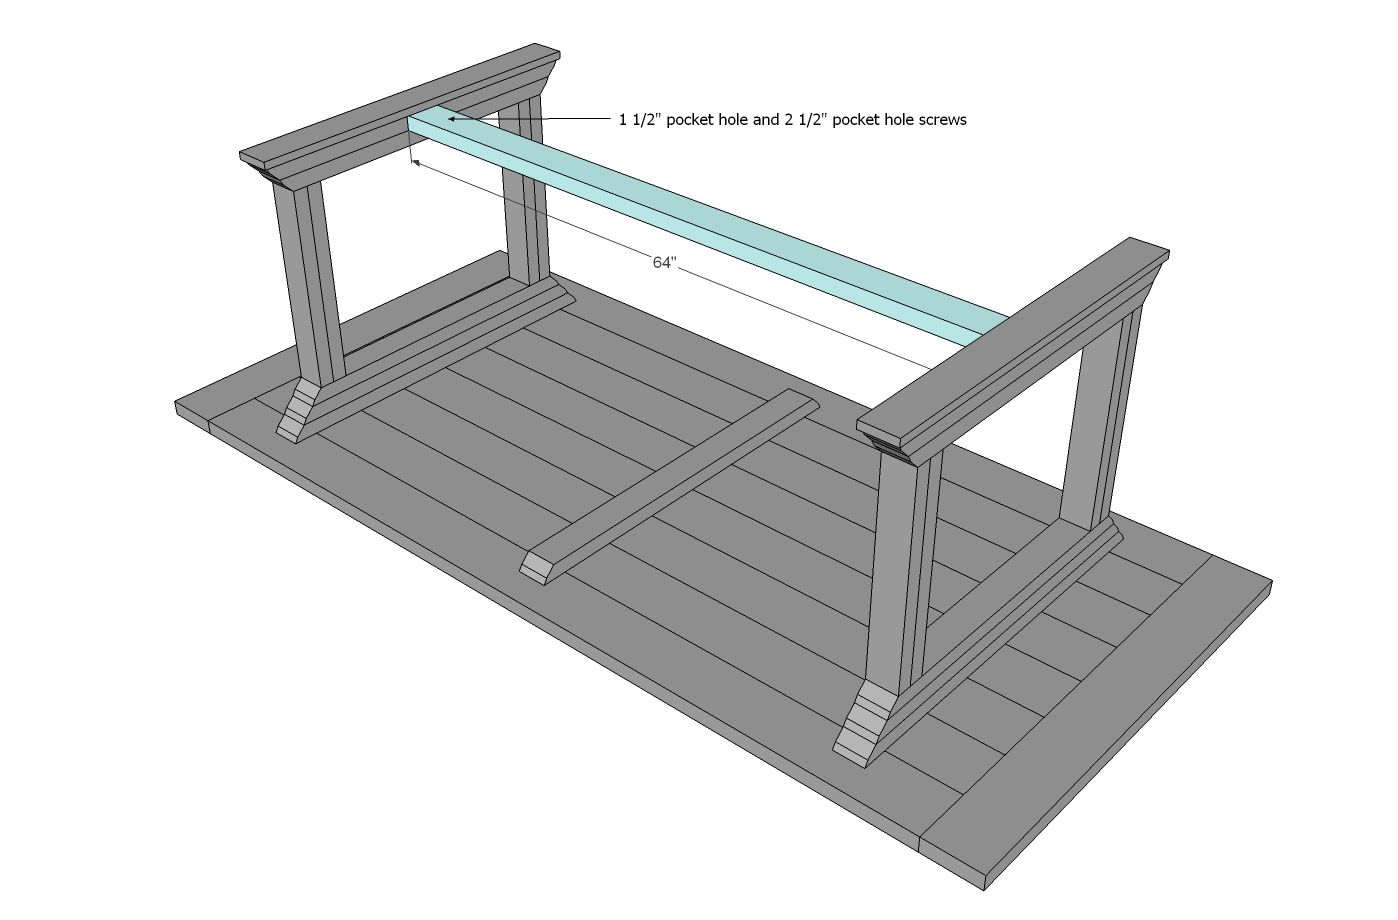
Step 9 Instructions:
Add the stretcher with pocket holes to the underside. You’ll probably want to measure and cut this guy to fit depending on your 2×4 widths – just make sure it’s the same distance apart as the legs sets are at the tops.
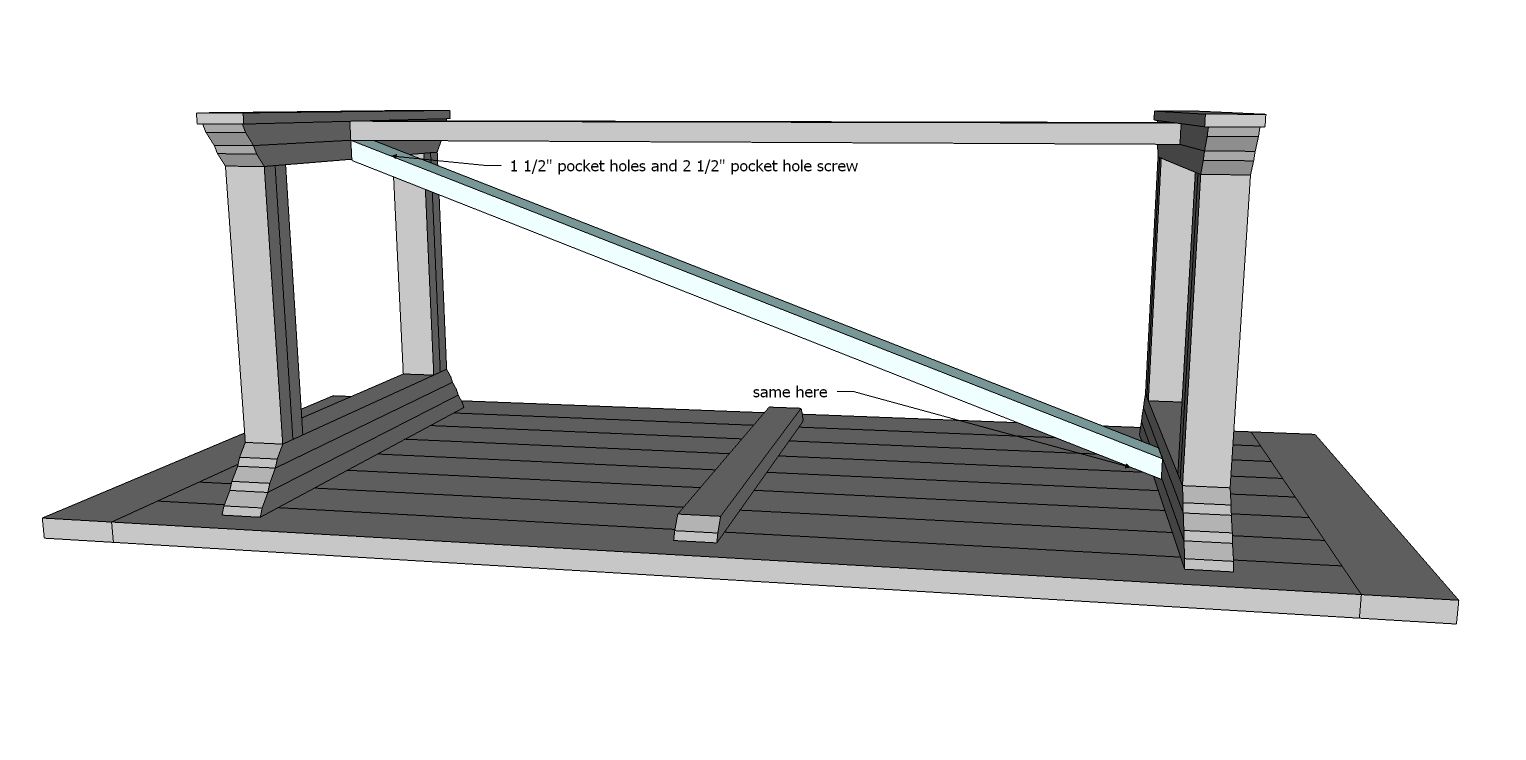
Step 10 Instructions:
If your saw doesn’t do 50 degree miters, what you can do is just use 2x2s at an angle cut (you can make angle cuts with a circular saw to just about any degree), cutting two 2x2s the full length and overlappping them, crossing in the middle. Then you can go back and fill in the spaces with 2x2s if you want.
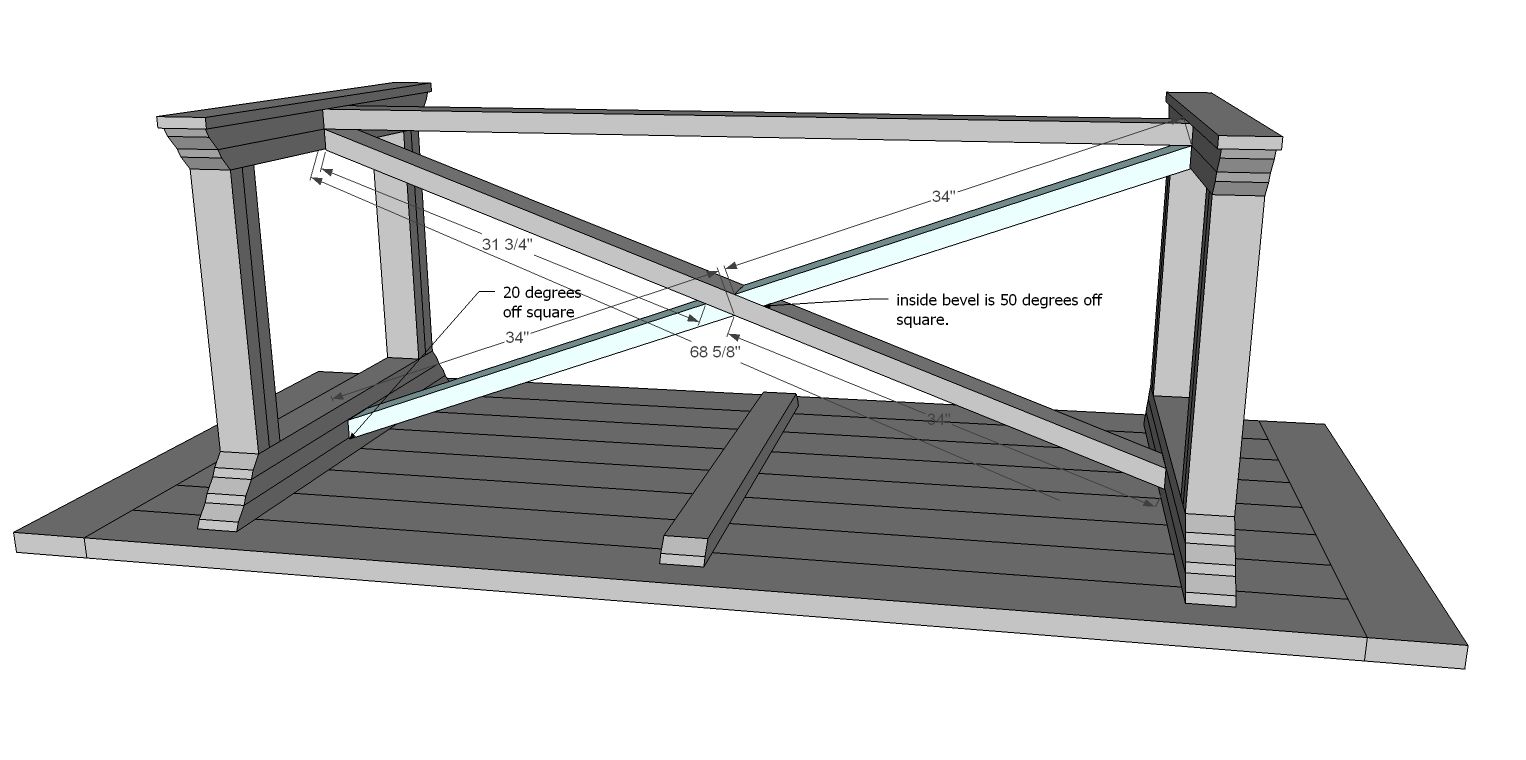
Step 11:
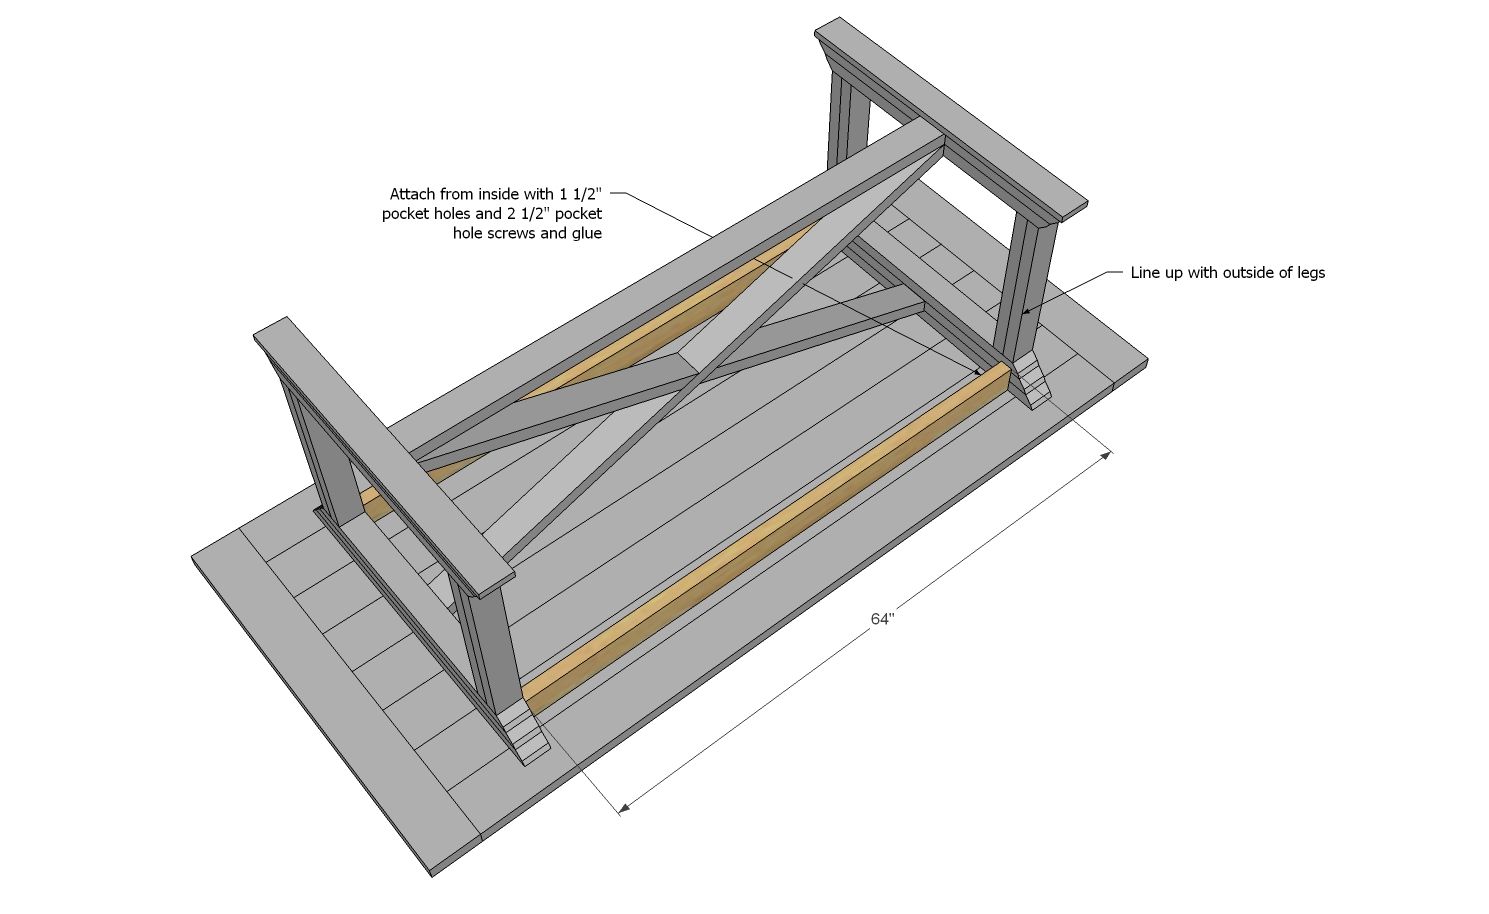
For the 2x4s, add the second part to the center X.
Step 12:
We also came up with a second variation with aprons just in case you planned to use the table for extra heavy loads -the aprons will add a TON of support but Jen felt that she didn’t need them. If you do the aprons, you’ll omit the center 2×4.
Preparation Instructions:
Fill all holes with wood filler and let dry. Apply additional coats of wood filler as needed. When wood filler is completely dry, sand the project in the direction of the wood grain with 120 grit sandpaper. Vacuum sanded project to remove sanding residue. Remove all sanding residue on work surfaces as well. Wipe project clean with damp cloth. It is always recommended to apply a test coat on a hidden area or scrap piece to ensure color evenness and adhesion. Use primer or wood conditioner as needed.