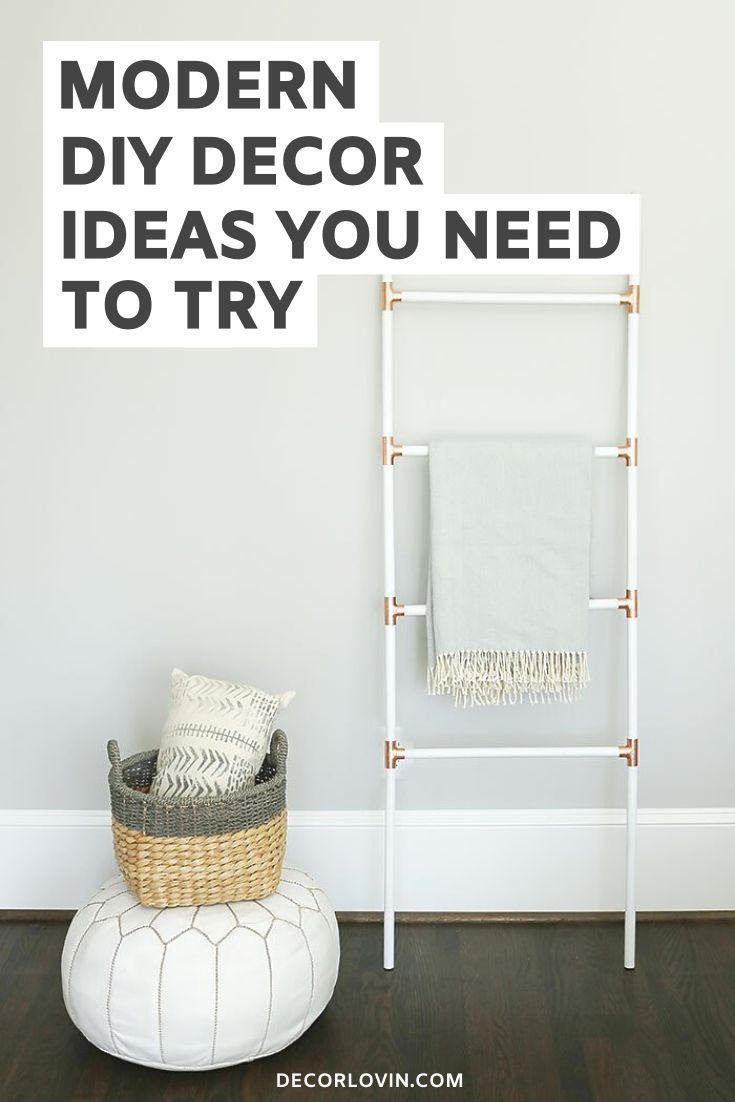
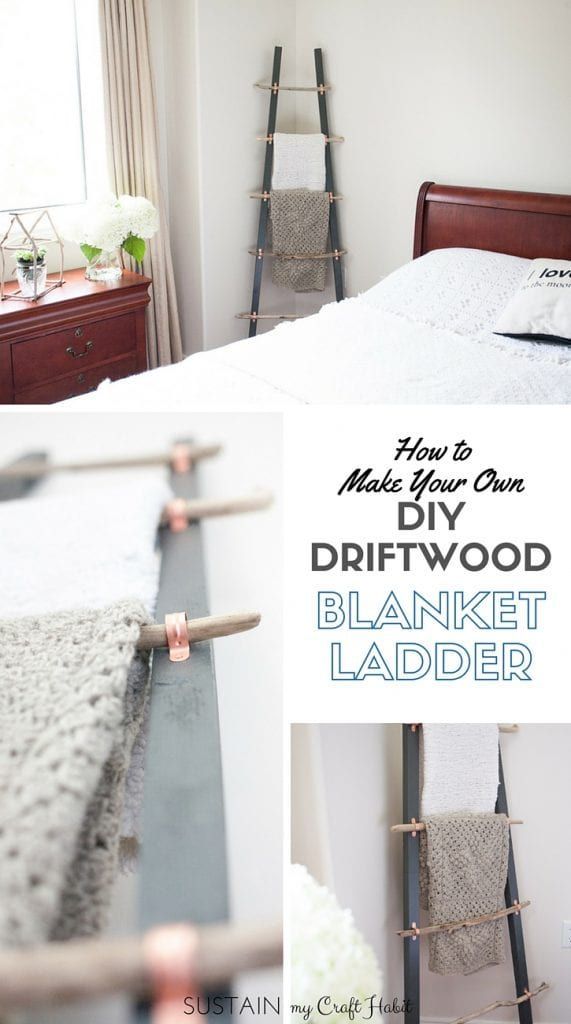
18 home accessories DIY website ideas
Page 3 of 18
15 Minute Window Valance (and DIY coordinating accessories)
 - 18 home accessories DIY website ideas")
Two It Yourself: 15 Minute Window Valance (and DIY coordinating accessories) You guessed it…it’s another addition to the $100 bathroom makeover. This was actually an edit that I made after being unhappy with the original stenciled drop cloth valance I made. The drop cloth curtain didn’t cost me anything because I already had the drop cloth, but this guy only cost me $4.25 (the cost of half a yard of this gorgeous HGTV/Waverly fabric between a sale and coupon). I’m certainly glad I splurged because this little piece of fabric makes the bathroom for me! Unfortunately, I didn’t take many any pictures as I made the new valance because I was kind of just wingin’ it, but since I’ve had a few requests for the tutorial I’ll try to explain how I did it as best as I can using a few graphics. The curtain rod (aka dowel) was already hanging over the window so the easiest way for me to measure how wide I needed my valance was to actually mark right on the rod the inside points were the rod holders hit. My window measurement came to 27″. A half a yard is 18 inches and the fabric comes standard 54″ wide on a roll, not a bolt. Let the graphics parade begin… I measured out 28 inches. I added the extra inch so I could create a half inch hem on both sides. I’ll let the graphics take it from here… At this point, the two sides of your valance and the bottom are hemmed and you have created a pocket rod. You can certainly leave your valance like this, but I went one step further to create a roman shade-like effect. To do this, flip your fabric back over so you are looking at the front. Kind of pinch the fabric where you want the fold to be and fold it down so the top half folds over the bottom. I pinned the sides at this point, pressed it with a hot iron and re-sewed right on the hemline to keep the fold in place. And there you have it…a stylish window valance that even a not-so-experienced sewer (or taper) can make in just a few minutes. Oh, and PS I used the leftover fabric to create a few coordinating accessories in the bathroom. I framed one of the flowers and put it on the bathroom shelf and I cut out another one and mod podged it (is <<< that added to Webster yet??) to a glass food jar which I turned into a DIY soap dispenser. I still had some left over scraps so I created a beautiful fabric art wall gallery which I'll be showing off on the blog within the next few days. As always, thanks for stopping by 2IY. If you like what you see we'd love for you to share it with a pin. And don't forget to subscribe by hitting the "email" icon at the top right so you don't miss a post!