Basic Jewellery Making Tips
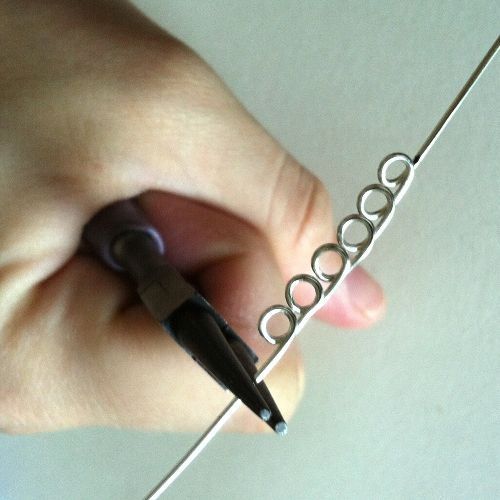
 
Basic Tools For The Beginner
* Nylon jaw pliers Рto straighten, flatten or harden your wire
* Round nose pliers Рto make loops in wire and spirals in your wire
* Flat nose pliers Рto open/close jump rings, make right angled shapes etc
* Wire cutters
* Chain nose pliers Рuseful for chainmail projects and opening closing jump rings
With these basic tools you can do an amazing amount of things with your jewelry. If your just starting out I’d recommend buying some cheap tools while you are getting used to how to use them and then upgrade to better ones when you have mastered them. This also is handy if your not sure if jewelry making is for you. Then if you find its not for you, you haven’t spent a fortune that is then wasted.
More Advanced Tools
I have all of these and personally think they are worth it!
* Wig Jig Рfor making wire shapes for earrings or necklaces Рvery useful
* Spiral Maker Рused on a wig jig to make spirals. You can do them with round nose pliers but this makes it much easier and leaves less marks on your wire
* Wire Twister Рenables you to twist two to five wires together neatly. You can make some very nice looking jump rings using twisted wire.
* Coil maker Рwith this you can make wire coils or springs and make more fancy jewelry. You can even make beads by twisting a coil over another coil.
* Photo Light Tent¬†– handy on those overcast and rainy days. Takes a little practice but definetly works. You may find the photo’s turn out better with the light inside the tent instead of from the outside. But whatever works best for you is good.
Making Eye Loops – for Beginners
Tools required:
* Round nose pliers
* Flat nose pliers
* Wire cutters
* Nylon jaw pliers
You will need to straighten a 10cm piece of wire with your nylon jaw pliers. Once you have mastered this technique you most likely will be able to do this with shorter wire.
Place the wire in your flat nose pliers and bend in a zig zag in the wire by bending down on one side of the pliers and up on the other side as shown in the photo below.
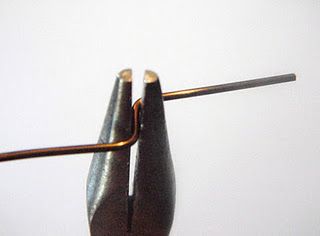
Then cut the wire just above the top curve as shown in the photo below.
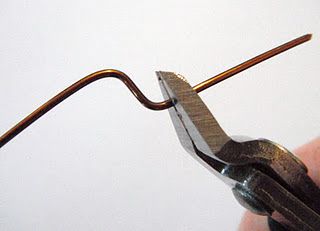
Hold the wire with the cut piece up and with the step facing away from you. Then place the round nose pliers on the curve that has just been cut as shown in the next photo.
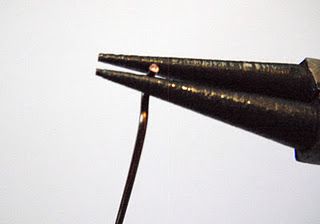
Roll the pliers towards you to form a loop and then place the pliers at the base of the loop to gently centre the loop as shown below.
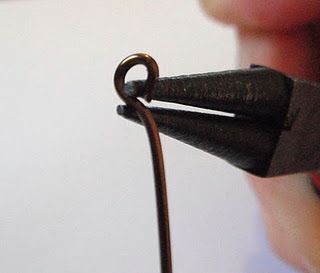
Now you have done your first eye loop!